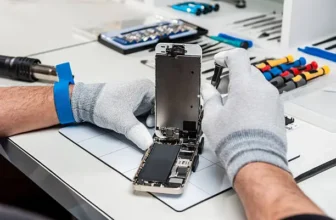
If this is your first time trying to fix an iPhone, it can feel a bit scary.
You might be wondering:
“What if I break something?”
“What tools do I even need?”
Don’t worry—you’re not alone. Every expert started exactly where you are now.
This simple guide will help you understand what to expect before you open your phone.
Start With These 3 Important Steps
Before you even think about opening your iPhone, you need to prepare properly.
1. Back Up Your iPhone
If your phone still works, back it up immediately.
Why?
Because repairs can go wrong, and you don’t want to lose your photos, contacts, or data.
Think of it as protecting everything important before you start.
2. Discharge the Battery Below 25%
This is one of the most important safety steps.
A charged lithium battery can be dangerous if damaged during repair.
So:
- Keep battery under 25%
- Or fully turn off and be extra careful if it won’t power on
Never skip this step.
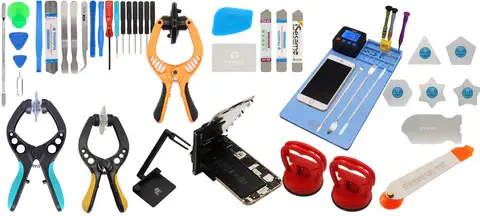
3. Gather the Right Tools and Know Your Model
Not all iPhones are the same.
For example:
- iPhone 8 ≠ iPhone 8 Plus
- Parts are NOT interchangeable
Make sure you:
- Identify your exact model
- Use correct tools (screwdrivers, spudger, picks)
Trying to use random tools can easily damage your phone.
Follow Instructions Carefully (This Is Where Most People Go Wrong)
Most repair mistakes happen when people rush or skip steps.
Once you start opening the phone:
- Follow each step in order
- Don’t “guess” anything
- Don’t skip ahead
Patience is the key here.
3 Common Things You’ll Deal With During Repair
Every iPhone repair has a few tricky moments. Here’s what to expect.
1. Screws and Drivers
iPhones use very small screws.
Important rules:
- Use the correct screwdriver for each screw
- Press straight down while turning
- Never force a screw
When reassembling:
- Start threading screws gently first
- Then tighten slowly
One wrong screw in the wrong place can cause damage.
2. Connector Cables
Inside your iPhone, you’ll find small pop connectors.
To remove them:
- Pry gently straight up
To reconnect:
- Align carefully
- Press gently until you feel a click
If it doesn’t click easily, stop and realign it. Never force it.
3. Battery Adhesive Strips
Batteries are held with special stretch-release adhesive.
Here’s how to handle them:
- Pull slowly at a low angle
- Keep steady tension
- Pull using the full strip, not just one side
If the strip breaks:
- Don’t panic
- Follow proper removal methods using tools or alcohol
Handle Parts Carefully (This Matters More Than You Think)
Small mistakes can cause big problems.
Always:
- Hold parts by the edges
- Avoid touching connectors and sensors
- Use tweezers when needed
Why?
Because fingerprints and oils can interfere with sensitive components.
If you accidentally touch something:
- Clean it gently with isopropyl alcohol
- Use a lint-free cloth
- Let it air dry
Don’t Force Anything During Reassembly
This is a golden rule.
If something doesn’t fit:
- Stop immediately
- Check alignment
- Make sure nothing is blocking the part
Forcing parts is one of the fastest ways to damage your phone.
Take your time and double-check everything.
Final Step: Test Everything Before Closing
Before sealing your phone completely:
- Turn it on
- Test screen, touch, battery, and buttons
If you replaced a battery:
- It may need charging before it powers on
Also, don’t forget:
- Dispose of old batteries safely
- Never throw them in regular trash
If Something Goes Wrong, Don’t Panic
Even professionals face issues sometimes.
If your repair doesn’t work:
- Recheck connections
- Look for missed steps
- Compare parts carefully
And if you’re still stuck, repair communities and guides can help you troubleshoot.
Final Thoughts: You’ve Got This
iPhone repair might feel complicated at first, but once you understand the basics, it becomes much easier.
Just remember:
- Prepare properly
- Work slowly
- Follow steps carefully
- Don’t force anything
That’s really the secret.
Happy repairing 👍
FAQ – iPhone Repair Beginner Tips
1. Is iPhone repair hard for beginners?
Not really. Most repairs are simple if you follow instructions carefully.
2. What is the most important safety step?
Keeping battery below 25% before starting.
3. Can I use any tools for repair?
No, using correct tools is very important to avoid damage.
4. What should I do if a part doesn’t fit?
Stop and recheck alignment instead of forcing it.
5. Do I need to back up my iPhone?
Yes, always back up before starting repair.
6. What if I break something during repair?
Check guides or repair forums for troubleshooting help.