
A cracked or damaged iPhone screen can feel frustrating. Your phone may still work, but using it becomes annoying and sometimes even risky.
The good news? You don’t need to replace your entire phone. A display replacement can make your iPhone 12 Pro look and feel brand new again.
Let’s go step by step and understand how this repair actually works.
Why iPhone 12 Pro Display Gets Damaged
The iPhone 12 Pro has a beautiful screen, but like all glass displays, it’s fragile.
Common reasons for damage include:
- Accidental drops
- Pressure on the screen
- Hard impacts
- Scratches turning into cracks
You may see:
- Cracked glass
- Touch not responding
- Black spots or lines
- Flickering display
If damage is serious, replacing the display is the best solution.
Tools You Need for iPhone 12 Pro Display Replacement
Before starting, make sure you have the right tools. This repair requires patience and precision.
You’ll need:
- Heat pad or iOpener
- Suction cup or iSclack tool
- Opening picks
- Spudger tool
- Tweezers
- Phillips screwdriver (#00)
- Pentalobe screwdriver
- Y000 screwdriver
- Isopropyl alcohol (90%+)
- Replacement display
- Display adhesive strips
Having all tools ready will make the process much smoother.
Important Safety Tips Before Starting
Before you begin:
- Turn off your iPhone completely
- Make sure battery is below 25%
Why?
Because a charged lithium battery can be dangerous if damaged during repair.
Also, keep all screws organized carefully. They are very small and easy to mix up.
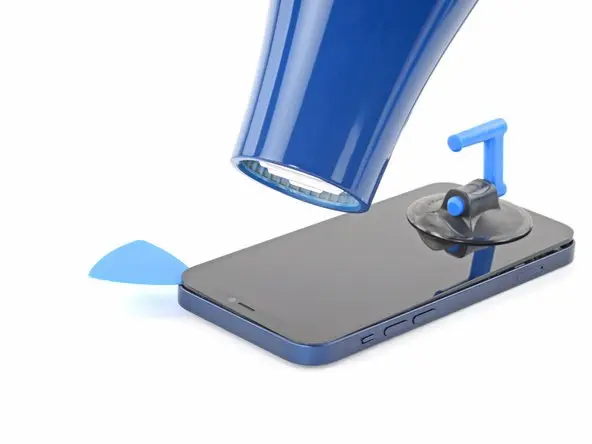
Opening the iPhone 12 Pro
Start by removing the SIM tray using a SIM eject tool.
Then:
- Remove the two pentalobe screws at the bottom
Now you need to open the screen.
The display is strongly glued to the frame, so heat is required.
Steps:
- Heat the bottom edge using iOpener or hair dryer
- Place suction cup near the heated area
- Pull gently to create a small gap
- Insert opening pick into the gap
Now slowly slide the pick around:
- Left side
- Right side
- Top edge
Take your time. The adhesive is strong.
Removing the Display Safely
Once the adhesive is cut, open the display like a book.
But don’t rush—internal cables are still attached.
Now:
- Hold display at a 90-degree angle
- Remove connector cover screws using Y000 driver
- Disconnect battery cable first
- Then disconnect display and sensor cables
After this, the display can be fully removed.
Removing the Speaker and Sensor Assembly
Before installing the new screen, you must transfer parts from the old display.
This includes:
- Speaker
- Microphone
- Ambient light sensor
- Proximity sensor
Steps:
- Remove screws carefully
- Heat the area slightly to soften adhesive
- Gently lift sensors using a spudger
- Remove the full assembly
Be very careful—these parts are delicate.
Installing the Assembly on New Display
Now move the assembly to your new screen.
Steps:
- Place all sensors into their correct positions
- Make sure no adhesive blocks sensor openings
- Keep cables flat and properly aligned
- Reinstall screws in original positions
This step is important for Face ID and sensor accuracy.
Installing the New Display
Now comes the final installation.
Steps:
- Apply fresh adhesive to the frame
- Align display cables with logic board
- Connect:
- Battery cable
- Display cable
- Sensor cables
- Secure connector covers with screws
Before sealing the phone:
- Turn it ON and test everything
If everything works, continue.
Closing the iPhone 12 Pro
Final steps:
- Remove adhesive backing
- Align display with top clips
- Press gently until it clicks into place
Then:
- Reinstall bottom pentalobe screws
- Insert SIM tray
Your iPhone is now fully assembled.
Final Thoughts: Is Display Replacement Worth It?
Yes, absolutely.
Replacing the display:
- Restores full screen clarity
- Fixes touch issues
- Saves money compared to a new phone
If your iPhone 12 Pro is still working, this repair is one of the best upgrades you can do.
FAQ – iPhone 12 Pro Display Replacement
1. Is iPhone 12 Pro screen replacement difficult?
It is moderately difficult but possible with the right tools.
2. Do I need heat to open the phone?
Yes, heat softens the adhesive holding the screen.
3. Will Face ID still work after repair?
Yes, if sensors are transferred correctly.
4. What is the biggest risk during repair?
Damaging internal cables while opening the display.
5. How long does screen replacement take?
Usually 60–90 minutes depending on experience.
6. Should I replace screen or buy a new phone?
If the phone works fine otherwise, replacing the screen is cheaper and better.


