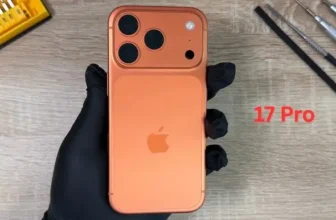
If your iPhone 17 Pro rear camera shows a black screen, fails to focus, captures blurry photos, or the image starts shaking or buzzing, the camera module may be faulty. In this step-by-step guide, you’ll learn how to safely replace the rear camera and restore full camera performance.
This tutorial is ideal for technicians and advanced DIY users who want to fix camera issues without replacing the entire phone.
If you’re comparing repair cost with buying new, check the latest
👉 Apple iPhone 17 Pro Price in Pakistan:
https://pricetoday.pk/mobile/apple-iphone-17-pro-price-in-pakistan/
You can also browse the complete
👉 Apple iPhone Price List in Pakistan:
https://pricetoday.pk/mobile/apple-iphone-price-in-pakistan/
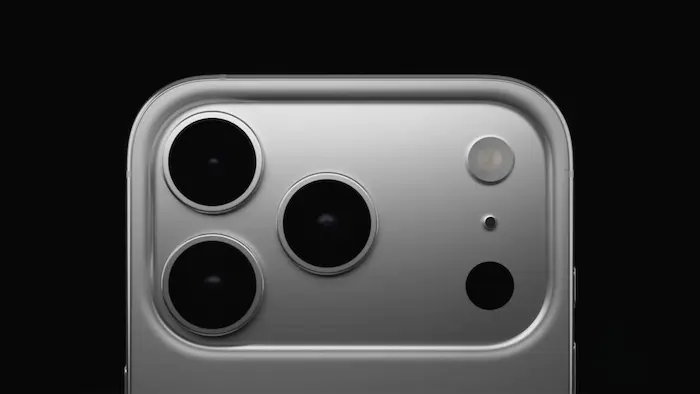
Common iPhone 17 Pro Rear Camera Problems
You may need a camera replacement if you notice:
- Black screen when opening Camera app
- Camera not focusing
- Blurry photos
- Shaking or vibrating image
- Buzzing noise during video recording
- Stabilization not working
Replacing the rear camera module usually resolves these issues.
Tools Required for iPhone 17 Pro Camera Replacement
Prepare the following tools:
- Pentalobe 0.8 mm screwdriver
- T4 Torx screwdriver
- Phillips 1 mm screwdriver
- Plastic pry tools
- Tweezers
- Suction cup
- Screen disassembly tool
- Adhesive sealing tape (to restore water resistance)
- Magnetic mat (recommended)
💡 The iPhone 17 Pro contains dozens of screws in different sizes. A magnetic mat helps prevent misplacement.
Step 1: Power Off and Remove Bottom Screws
- Turn off the iPhone completely.
- Remove the two screws next to the USB-C charging port using a Pentalobe screwdriver.
Step 2: Heat the Display Adhesive
To soften waterproof adhesive:
- Apply gentle, even heat (around 90°C / 194°F)
- Heat for 60–90 seconds
- Focus on the lower edge first
⚠️ Do not overheat the display.
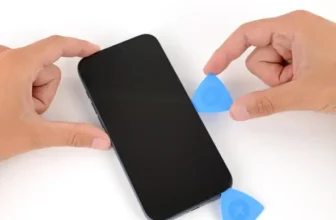
Step 3: Open the Display Safely
- Place the suction cup near the bottom edge.
- Insert a thin blade to create a small gap.
- Switch to a plastic pry tool.
- Work around the edges while keeping the surface warm.
At the top edge, two hinges connect the display to the frame. Push slightly downward to release them.
Open the screen carefully like a book.
Step 4: Disconnect Display and Sensor Connectors
- Remove the bracket covering the display connectors.
- Disconnect the display cable.
- Disconnect the front sensor connectors.
Place the display aside safely.
Step 5: Remove Cooling Plate and Battery Screws
- Remove the 14 screws securing the cooling plate and battery assembly.
- Remove the upper connector cover screw.
- Disconnect the ribbon cables.
Step 6: Remove Face ID Module
- Disconnect the two ribbon cables.
- Carefully remove the Face ID module from the housing.
Handle this module gently to avoid damage.
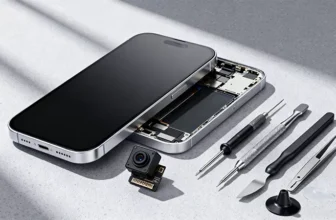
Step 7: Remove Rear Camera Module
- Disconnect the rear camera cables from the logic board.
- Remove the screws securing the rear camera module.
- Lift the camera out carefully.
If your device had focus issues, shaking, or black screen, this replacement should solve it.
Important: Camera Pairing & Calibration
The rear camera is a paired component, meaning it is uniquely linked to the logic board.
After installing a genuine Apple camera, you must calibrate it using Repair Assistant.
Step 8: Clean and Install New Camera
Before installing:
- Use an air blower to remove dust from the lens area.
Then:
- Install the new rear camera module.
- Secure it with correct screws.
- Reconnect ribbon cables.
Step 9: Reinstall Face ID & Internal Components
- Install the Face ID module.
- Reconnect its ribbon cables.
- Reinstall connector covers.
- Tighten all screws properly.
Step 10: Boot Test Before Sealing
- Place the cooling plate back with a few screws.
- Reconnect display connectors.
- Power on the device.
Check:
- Phone boots normally
- Camera app opens
- All zoom levels work
- Focus is sharp
- Stabilization works
- No shaking or buzzing
Test both Photo and Video modes on every rear lens.
Step 11: Calibrate Camera Using Repair Assistant
To complete pairing:
- Go to Settings → General → About
- Open Parts & Service History
- Follow calibration prompts
- Complete the camera configuration process
After calibration, camera performance should be fully restored.
Step 12: Restore Water Resistance
Once the phone is opened, original adhesive loses its sealing ability.
To restore protection:
- Remove old adhesive from the frame.
- Clean residue using 91%+ isopropyl alcohol.
- Align new waterproof sealing tape carefully.
- Press along edges using a plastic spudger.
- Remove the top liner.
If you don’t have replacement adhesive yet, keep the old tape temporarily.
Step 13: Final Assembly
- Reinstall cooling plate with 14 screws.
- Reconnect display and sensor connectors.
- Install bracket and secure screws.
- Press display firmly along edges.
- Reinstall bottom screws near USB-C port.
Your iPhone 17 Pro rear camera replacement is now complete.
Should You Repair or Upgrade?
Rear camera repair is usually more affordable than replacing the entire phone. However, if multiple components are failing, comparing market prices may help.
Check updated iPhone prices here:
👉 https://pricetoday.pk/mobile/apple-iphone-price-in-pakistan/
FAQ – iPhone 17 Pro Rear Camera Replacement
Why is my iPhone 17 Pro rear camera showing a black screen?
A damaged camera module, loose connector, or failed stabilization system can cause this issue.
Why is my camera shaking or buzzing?
This usually indicates a faulty optical image stabilization (OIS) mechanism inside the camera module.
Do I need calibration after replacing the camera?
Yes. The rear camera is paired with the logic board. You must calibrate it using Repair Assistant in the Parts & Service History section.
Can I replace iPhone 17 Pro rear camera at home?
It is possible but requires technical skills, proper tools, and careful handling of delicate internal components.