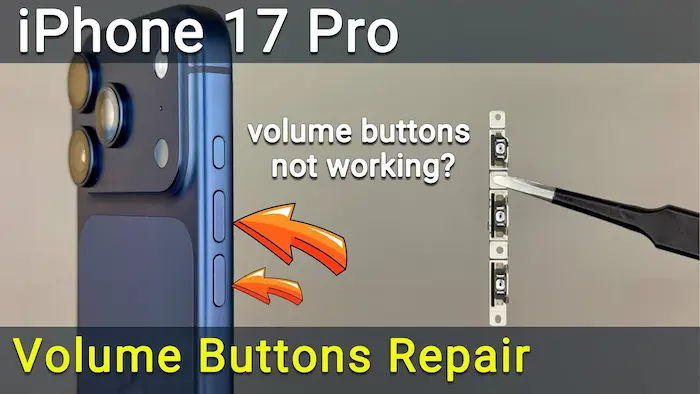
If your iPhone 17 Pro volume buttons are stuck, not clicking, or completely unresponsive, the issue is usually a damaged volume button flex cable. Whether Volume Up isn’t working, Volume Down fails to respond, or both buttons work intermittently — this step-by-step repair guide will help you fix it properly.
Instead of replacing the entire phone, you can restore normal button function by replacing the internal flex cable.
If you’re comparing repair cost with buying new, check the latest
👉 Apple iPhone 17 Pro Price in Pakistan:
https://pricetoday.pk/mobile/apple-iphone-17-pro-price-in-pakistan/
You can also explore the complete
👉 Apple iPhone Price List in Pakistan:
https://pricetoday.pk/mobile/apple-iphone-price-in-pakistan/
Common iPhone 17 Pro Volume Button Issues
You may need a volume flex replacement if:
- Volume Up button doesn’t respond
- Volume Down button doesn’t work
- Buttons feel stuck or hard to press
- No clicking feedback
- Buttons register intermittently
Before opening the phone, check for dust or debris around the buttons and clean gently. If the issue remains, replacing the flex cable is the reliable solution.
Tools Required for iPhone 17 Pro Volume Button Repair
Prepare the following tools:
- Pentalobe 0.8 mm screwdriver
- T4 Torx screwdriver
- Tri-Wing 0.8 mm screwdriver
- Phillips 1 mm screwdriver
- Plastic pry tools
- Tweezers
- Suction cup
- Screen disassembly tool
- Adhesive sealing tape (for water resistance restoration)
- Magnetic mat (highly recommended)
💡 The iPhone 17 Pro contains dozens of screws in different sizes. A magnetic mat helps keep them organized for proper reassembly.
Step 1: Power Off and Remove Bottom Screws
- Turn off the iPhone completely.
- Remove the two screws located next to the USB-C port using a Pentalobe screwdriver.
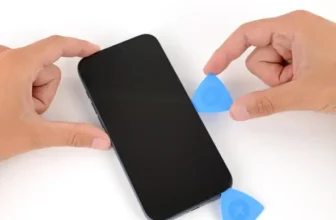
Step 2: Heat and Open the Display
To soften waterproof adhesive:
- Apply gentle heat (around 90°C / 194°F)
- Heat for 60–90 seconds
Then:
- Place a suction cup near the bottom edge.
- Insert a thin blade to create a small gap.
- Switch to a plastic pry tool.
- Work carefully around the edges while keeping the surface warm.
At the top edge, release the display hinges and open the screen like a book.
Step 3: Disconnect Display and Front Sensor
- Remove the bracket covering display connectors.
- Disconnect the display cable.
- Disconnect front sensor connectors.
Set the display aside safely.
Step 4: Remove Cooling Plate and Internal Components
- Remove the 14 screws securing the cooling plate and battery assembly.
- Remove the upper connector cover screw.
- Disconnect ribbon cables.
- Remove the Face ID module.
- Remove the rear camera module.
- Remove the ear speaker.
Continue removing connector covers and disconnect all cables from the logic board.
Step 5: Lift and Flip the Logic Board
- Carefully lift the logic board without fully removing it.
- Flip it gently to access the final hidden connector.
- Remove the screw securing the last connector cover.
- Disconnect the final cable.
Now you have access to the volume button flex cable.
Step 6: Remove the Old Volume Button Flex Cable
- Remove the screws securing the volume flex cable to the chassis.
- Carefully peel and remove the cable from the iPhone body.
⚠️ If buttons were stuck or not clicking, this damaged flex cable is likely the cause.
Step 7: Install the New Volume Flex Cable
- Position the new volume button flex cable correctly.
- Route the cable exactly as the original.
- Secure it with the correct screws.
Improper alignment may cause button stiffness or inconsistent response.
Step 8: Reinstall the Logic Board
- Reconnect the wireless charging coil cable first.
- Carefully flip and lower the logic board into position.
- Ensure no cables are trapped underneath.
- Reconnect all remaining ribbon cables.
- Reinstall connector covers and screws.
Step 9: Reinstall Other Components
- Install the ear speaker.
- Blow dust from the rear camera area before reinstalling it.
- Reinstall the rear camera module and secure it.
- Reinstall the Face ID module and reconnect its cables.
Step 10: Boot Test Before Sealing
- Reinstall the cooling plate with a few screws.
- Reconnect the display.
- Power on the device.
Now test:
- Press Volume Up multiple times
- Press Volume Down multiple times
- Confirm proper click feedback
- Ensure volume changes register instantly
If buttons feel stiff or don’t register properly, reopen and check alignment.
Step 11: Restore Water Resistance
Once opened, original adhesive loses sealing strength.
To restore protection:
- Remove old adhesive from the frame.
- Clean residue with 91%+ isopropyl alcohol.
- Apply new waterproof sealing tape.
- Press firmly along the perimeter.
- Remove top liner.
Step 12: Final Assembly
- Secure the cooling plate with all 14 screws.
- Reconnect display and sensor connectors.
- Install the bracket and tighten screws.
- Press display edges firmly.
- Reinstall bottom screws near the USB-C port.
Your iPhone 17 Pro volume buttons should now work normally.
Repair vs Upgrade – What’s Better?
Replacing the volume button flex cable is far cheaper than replacing the entire device. However, if your phone has multiple hardware issues, checking updated market prices may help you decide.
👉 Compare latest iPhone models here:
https://pricetoday.pk/mobile/apple-iphone-price-in-pakistan/
FAQ – iPhone 17 Pro Volume Button Repair
Why is my iPhone 17 Pro volume button not working?
A damaged flex cable, internal corrosion, or physical impact may cause the issue.
Can dust cause volume button problems?
Yes, debris can block the mechanical button. Clean gently before opening the device.
Do I need calibration after replacing volume buttons?
No. Volume buttons do not require software calibration.
Is it difficult to replace the volume flex cable?
Yes, it’s an advanced repair that requires removing the logic board and multiple components.