If your Apple Watch Series 9 vibration or haptic feedback stops working, you may miss notifications, alarms, or silent alerts. This issue is usually caused by a faulty vibration motor, and fortunately, it can be repaired with the right tools and careful steps.
In this detailed DIY guide, you’ll learn how to replace the vibration motor on Apple Watch Series 9 and restore normal vibration functionality.
🔧 Tools Required for Apple Watch Series 9 Repair
Before starting the repair, prepare these tools:
- Tri-Wing Y0.8mm screwdriver
- Plastic pry tools
- Tweezers
- Screen disassembly tool
- B7000 adhesive glue
- Screen clamp or rubber bands
- Magnetic mat (recommended)
A magnetic mat helps organize screws and prevents losing tiny components during repair.
⚠️ Signs Your Apple Watch Vibration Motor Is Faulty
You may need vibration motor replacement if:
- Watch does not vibrate for notifications
- Silent alarms don’t work
- Haptic feedback feels weak or inconsistent
- No vibration during calls or alerts
Replacing the vibration motor usually resolves these issues completely.
🔌 Step 1: Power Off the Apple Watch
- Turn off your Apple Watch Series 9.
- Remove the watch bands for easier handling.
Always disconnect power before opening any electronic device.
🔥 Step 2: Heat the Display
To loosen adhesive:
- Warm the display using a hair dryer for about 1 minute.
- Heat evenly around the edges.
This softens adhesive and reduces the risk of screen damage.
🪛 Step 3: Separate the Display Carefully
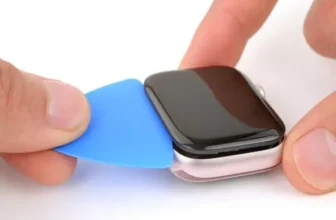
- Insert a thin blade or opening tool into the gap between the display and frame.
- Slowly work around all edges.
- Lift the display gently and flip it toward the crown side.
⚠️ Avoid forcing the screen — patience prevents cable damage.
🔗 Step 4: Disconnect Display Cables
- Carefully peel protective tape from ribbon cables.
- Unlock connectors using a plastic tool.
- Slide display cables out slowly.
Place the display safely aside.
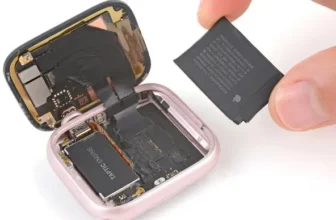
🔋 Step 5: Remove the Battery
The battery is glued to the housing:
- Apply a small amount of isopropyl alcohol under the battery.
- Wait a few seconds to weaken adhesive.
- Pry the battery gently using a plastic tool.
- Lift the connector latch and disconnect the battery cable.
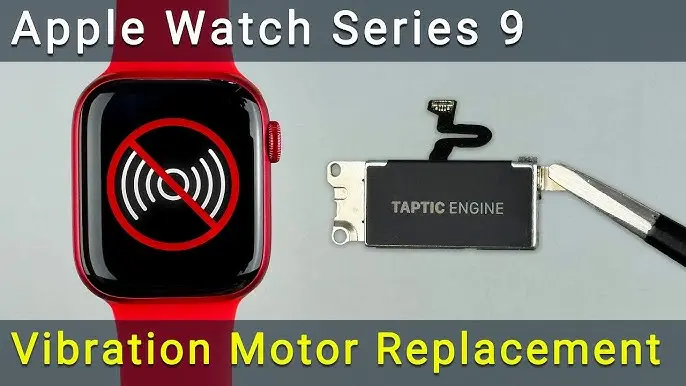
⚙️ Step 6: Remove the Vibration Motor
- Unscrew the vibration motor mounting screws.
- Disconnect the motor cable from the mainboard.
- Carefully remove the faulty motor.
This component controls all haptic feedback functions.
🔄 Step 7: Install the New Vibration Motor
- Place the new motor in position.
- Connect the cable to the motherboard.
- Secure it using screws.
Make sure the connector sits firmly to avoid vibration failure later.
🔌 Step 8: Reconnect Battery and Display
- Insert display ribbon cables back into connectors.
- Reconnect the battery cable and lock the latch.
- Reuse original adhesive if still sticky or apply double-sided tape.
Power on the watch to test vibration before sealing.
💧 Step 9: Restore Water Resistance
After confirming vibration works:
- Clean old adhesive using isopropyl alcohol.
- Apply adhesive gasket or B7000 glue around the frame.
⚠️ Note: Water resistance may reduce after repair, so avoid full water submersion.
🧷 Step 10: Clamp and Cure the Adhesive
- Use screen clamps or rubber bands to hold the display.
- Surface drying: ~6 minutes
- Safe handling: after 45 minutes
- Full curing time: 24 hours
Remove excess glue once partially dried.
✅ Final Testing
After reassembly:
- Test notification vibration
- Check alarms and haptic feedback
- Ensure screen responds normally
If everything works correctly, your repair is complete.
🛠️ Tips to Extend Apple Watch Lifespan
- Avoid drops and heavy impacts.
- Keep device clean and dry.
- Use protective cases during workouts.
- Avoid overheating environments.
❓ Frequently Asked Questions (FAQs)
Why is my Apple Watch Series 9 not vibrating?
A damaged or disconnected vibration motor is the most common cause.
Can vibration motor replacement fix notification issues?
Yes, if alerts work but vibration doesn’t, replacing the motor usually solves it.
Is Apple Watch waterproof after repair?
Water resistance may decrease, so avoid swimming or diving afterward.
How long does this repair take?
Around 60–90 minutes depending on experience.
Do I need professional tools?
Basic repair tools are enough, but precision tools are strongly recommended.