iPhone 17 Pro Screen Broken? Here’s How to Fix It
A cracked or defective screen can make your iPhone 17 Pro difficult — or impossible — to use. Whether your display is shattered, touch is unresponsive, or the screen shows display glitches, replacing the screen assembly can restore your phone to full working condition.
This guide walks you through the complete screen replacement process, including calibration and restoring water resistance.
Tools Required for iPhone 17 Pro Screen Replacement
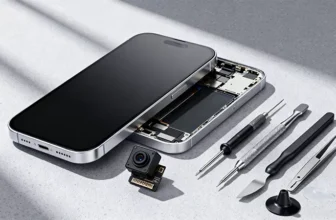
Before starting, gather the following tools:
- Precision screwdriver set
- Plastic pry tools
- Tweezers
- Suction cup
- Screen disassembly tool
- Waterproof adhesive sealing tape
- Magnetic mat (highly recommended)
💡 Pro Tip:
Use a magnetic mat to organize screws. The iPhone contains many screw sizes, and mixing them up can damage internal components.
Step 1: Power Off the iPhone
Always turn off the device before opening it.
Then remove the two screws located beside the USB-C charging port.
Step 2: Heat the Display Adhesive
Apple seals the display using strong waterproof adhesive.
- Apply gentle heat to the bottom edge
- Heat for 60–90 seconds
- Recommended temperature: 90°C (194°F)
Heating softens adhesive and reduces the risk of cracking the frame or display.
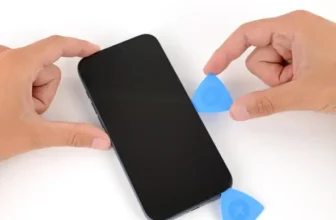
Step 3: Open the iPhone 17 Pro Display
- Place a suction cup near the bottom edge.
- Insert a thin blade into the gap.
- Switch to a plastic pry tool once space opens.
- Slowly move around the edges while keeping the surface warm.
⚠️ The display opens sideways like a book due to top hinges.
Step 4: Disconnect Display and Sensor Cables
- Remove the connector bracket screw.
- Carefully disconnect:
- Display cable
- Front sensor connectors
Set the display aside safely.
Step 5: Transfer Front Sensor Flex Cable
The proximity and ambient light sensor must be moved from the old screen to the new one.
Remove Sensor Assembly
- Remove two securing screws.
- Apply slight heat using a hair dryer.
- Carefully loosen adhesive.
- Detach the flex cable slowly.
Keeping the surface warm helps prevent cable damage.
Step 6: Install Sensors on the New Screen
- Position the front sensor assembly onto the replacement screen.
- Warm the flex cable slightly to activate adhesive bonding.
- Secure it using the original screws.
Proper alignment is essential for Face ID and brightness functions.
Step 7: Install the New Display
- Reconnect display cables to the logic board.
- Close the phone gently without sealing it yet.
Step 8: Power On and Test the Screen
Turn on the iPhone and check:
- Display brightness
- Touch responsiveness
- No dead zones
- Proper image quality
Testing before sealing saves time if adjustments are needed.
Step 9: Calibrate the New Screen (Repair Assistant)
After replacement, Apple requires calibration for proper operation.
How to Calibrate:
- Go to Settings
- Open General
- Tap About
- Select Parts & Service History
- Follow calibration instructions
After calibration, test touchscreen accuracy again.
Step 10: Restore Water Resistance
Opening the iPhone breaks the original waterproof seal.
Remove Old Adhesive
- Peel off existing sealing tape.
- Clean residue using 91%+ isopropyl alcohol.
Apply New Adhesive
- Align sealing tape carefully around the frame.
- Press firmly along edges using a plastic spudger.
- Remove adhesive liner.
Step 11: Reassemble the iPhone
- Reconnect display and sensor connectors.
- Install connector bracket.
- Press screen edges evenly.
- Reinstall bottom screws near charging port.
Your screen replacement is now complete.
Final Checks After Screen Replacement
Before regular use, confirm:
- Touchscreen works everywhere
- No ghost touches
- Face ID functions normally
- Display brightness adjusts correctly
- Screen sits flush with frame
FAQs — iPhone 17 Pro Screen Repair
Do I need calibration after replacing the screen?
Yes. Apple’s Repair Assistant calibration ensures full functionality and removes system warnings.
Will Face ID work after screen replacement?
Yes, if the original sensor flex cable is transferred correctly.
Is water resistance fully restored?
Only if new waterproof adhesive is applied properly.
Can beginners replace an iPhone screen?
Yes, but patience and proper tools are required.
How long does the repair take?
Typically 60–90 minutes for first-time repairs.
Final Thoughts
Replacing an iPhone 17 Pro screen may seem complicated, but with careful handling and the right tools, it’s a manageable DIY repair. Following each step carefully — especially sensor transfer and calibration — ensures your device performs like new again.
A successful screen replacement not only restores usability but also extends the lifespan of your iPhone significantly.