A cracked screen can feel like the end of your phone’s life. Your Samsung Galaxy S10+ still works, but the broken display makes everything frustrating.
The good news? You don’t need a new phone. Replacing the display can bring your S10+ back to life and make it look brand new again.
In this guide, we’ll walk through the full display replacement process in a simple, easy-to-understand way.
Why Samsung Galaxy S10+ Display Breaks Easily
Let’s be honest—modern phone screens look amazing, but they are fragile.
Even a small drop can cause:
- Cracks across the glass
- Black spots or lines on the screen
- Touch not working properly
- Flickering or dead display
If your display is badly damaged, replacement is usually the best option instead of repair.
Tools You Need for Display Replacement
Before starting, make sure you have the right tools. This repair requires patience and proper equipment.
You’ll need:
- Heat pad (iOpener or similar tool)
- Suction cup tool
- Plastic opening picks
- Spudger tool
- Phillips screwdriver (#00)
- Tweezers
- Isopropyl alcohol (90%+)
- Adhesive remover (optional)
- Magnetic mat for screws
These tools help you safely open the phone without damaging internal parts.
Important Safety Step Before You Start
Before doing anything:
- Turn off your phone completely
- Make sure battery is below 25%
Why?
Because a damaged battery can be dangerous if it is fully charged during repair.
Also, work slowly. This repair involves delicate parts.
Opening the Back Cover of Galaxy S10+
To access the display, you first need to open the phone from the back.
Here’s how it works:
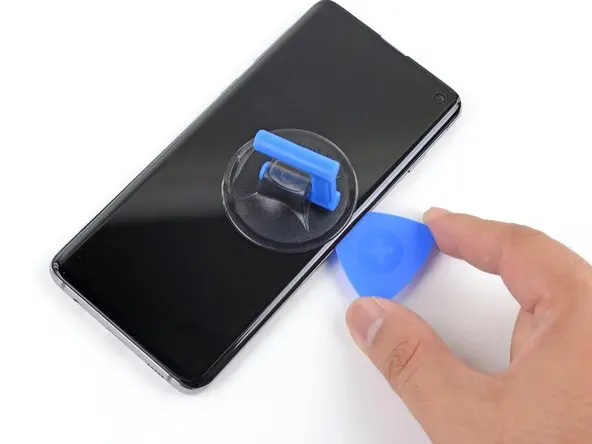
Start by heating the back cover using a heat pad or hair dryer. This softens the adhesive holding the glass.
Then:
- Place a suction cup near the heated area
- Pull gently to create a gap
- Insert a plastic pick into the gap
Now slowly move the pick around the edges to cut the adhesive.
Repeat this process:
- Heat
- Lift
- Slide
Do this until the back glass comes off completely.
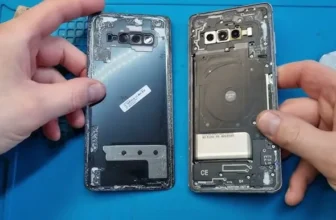
Removing Internal Components Carefully
Once the phone is open, you’ll see several internal parts blocking access.
You will need to remove:
- Screws from the NFC coil and speaker module
- Wireless charging components
These are held by many small screws, so keep them organized carefully.
After removing screws:
- Use a spudger tool to lift the components out
Next step is very important:
- Disconnect the battery cable first
- Then disconnect the display cable
This prevents damage and makes the repair safe.
Removing the Old Display
The display is strongly glued to the frame. It cannot be removed easily.
To remove it safely:
- Apply heat around the edges of the screen
- Use suction cup to create a small gap
- Insert a plastic pick under the display
Now slowly move around the edges to cut the adhesive.
Be very careful near the left side because the display cable is hidden there. Cutting it can damage the phone completely.
You can use a few drops of isopropyl alcohol to soften the glue if needed.
Once all adhesive is removed, the display can be lifted out from the frame.
Installing the New Display
Now comes the exciting part—installing the new screen.
Before placing it:
- Apply fresh adhesive to the mid-frame
Then:
- Carefully slide the display cable through the frame slot
- Place the display onto the frame gently
Now reconnect:
- Display cable to the motherboard
- Battery cable (very important)
Once everything is connected properly, the phone is ready for reassembly.
Reassembling the Galaxy S10+
Now reverse the process step by step:
- Reinstall NFC antenna, charging coil, and speaker
- Tighten all screws carefully
- Apply new adhesive around the back cover
Finally:
- Press the back glass firmly into place
- Make sure it is sealed properly on all sides
Let it sit for a few minutes so the adhesive fully bonds.
Final Thoughts: Is Display Replacement Worth It?
Yes, absolutely.
If your Samsung Galaxy S10+ still works but the screen is broken, replacing the display is the smartest choice.
It gives you:
- A fully working phone again
- Much cheaper solution than buying new
- Better usability and appearance
Just take your time during the repair, especially when handling cables and adhesive.
FAQ – Samsung Galaxy S10+ Display Replacement
1. Can I replace the S10+ screen myself?
Yes, but you need tools and patience. It’s a delicate repair.
2. What causes screen damage in S10+?
Mostly drops, pressure, or accidental impacts.
3. Is heating necessary for screen removal?
Yes, heat softens the adhesive and makes opening safe.
4. Can I damage my phone during repair?
Yes, especially cables. Work slowly and carefully.
5. How long does screen replacement take?
Around 1 to 2 hours depending on experience.
6. Is replacing the display better than buying a new phone?
If the phone works fine otherwise, yes—it’s more cost-effective.