Cracked iPhone 16 Pro Max Back Glass? Here’s How to Replace It
A broken back glass doesn’t just affect the appearance of your iPhone 16 Pro Max — it can also impact wireless charging, microphone performance, and overall durability.
In this step-by-step guide, you’ll learn how to safely replace the rear glass assembly and restore your phone to a like-new condition.
Tools Required for Back Glass Replacement
Before starting the repair, prepare the following tools:
- Pentalobe 0.8 mm screwdriver
- Tri-Wing 0.8 mm screwdriver
- Tweezers
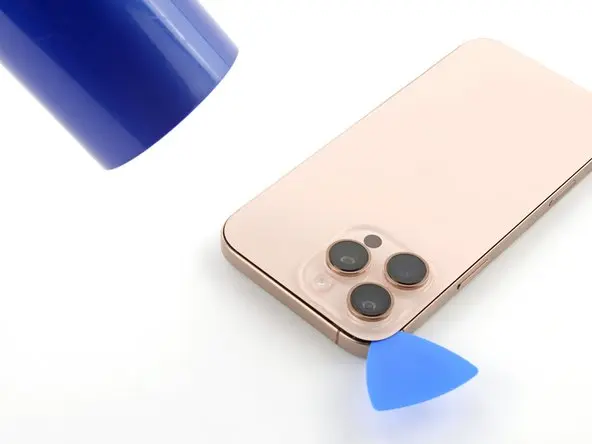
- Plastic pry tools
- Suction cup
- Screen disassembly tool
- Waterproof adhesive sealing tape
💡 Pro Tip:
Proper tools reduce the risk of damaging internal components during disassembly.
Step 1: Power Off the iPhone
Turn off your device by pressing and holding:
- Volume Up button
- Power button
Then remove the two screws near the charging port.
Step 2: Heat the Back Glass Adhesive
Apple secures the back glass with strong adhesive.
- Heat the back glass for about 1 minute
- Recommended temperature: 90°C
- Use a hair dryer or heat gun
The surface should feel warm, not extremely hot.
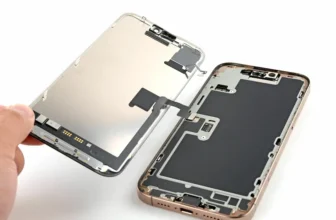
Step 3: Remove the Back Glass Safely
- Place a suction cup near the bottom edge.
- Gently lift to create a small gap.
- Insert a thin blade carefully.
- Switch to a plastic pry tool.
- Work slowly around the edges while reheating as needed.
⚠️ Important:
Do not insert tools deeper than 3 mm to avoid internal damage.
At the top edge, release the two metal hinges by sliding the glass downward.
Step 4: Disconnect Internal Cables
Carefully lift the back glass while watching for the connecting cable.
Then:
- Remove connector cover screws
- Disconnect:
- Battery cable
- Back glass cable
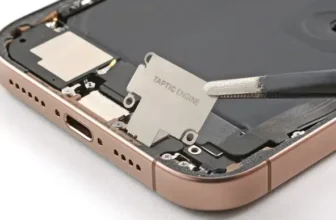
Step 5: Transfer Components to the New Back Glass
The rear glass assembly includes:
- Flashlight diode
- Rear microphone
- Wireless charging coil
If your replacement part does not include these components, transfer them from the old glass assembly.
These parts are connected via a single ribbon cable.
Step 6: Test Before Final Assembly
After connecting the new back glass:
- Turn on the iPhone.
- Test:
- Flashlight
- Rear microphone
- Wireless charging
Testing early prevents reopening the phone later.
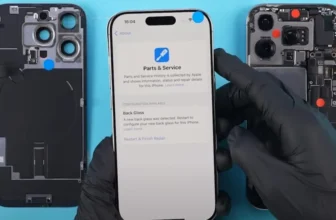
Step 7: Calibrate Using Repair Assistant
Some replacements require calibration through Apple’s Repair Assistant.
Calibration Steps
- Open Settings
- Go to General → About
- Select Parts & Service History
- Tap Restart & Finish Repair
- Connect to Wi-Fi
- Ensure battery level is above 20%
The configuration process may take several minutes.
Troubleshooting Repair Assistant Issues
If calibration fails:
- Ensure stable Wi-Fi connection
- Confirm battery level above 20%
- Restart the device and retry
- Reconnect installed components
- Verify replacement part compatibility
⚠️ Third-party parts may show “Unknown Part” status but can still function normally.
If the replacement module is activation-locked, you may need the original Apple ID credentials used with that component.
Step 8: Restore Water Resistance
Opening the phone breaks the original waterproof seal.
Remove Old Adhesive
- Peel off old sealing tape.
- Clean residue using 91%+ isopropyl alcohol.
Apply New Waterproof Adhesive
- Align sealing tape carefully with frame edges.
- Press firmly around the perimeter.
- Peel protective liner.
Use a rubber blower to remove dust from camera lenses before sealing.
Step 9: Final Assembly
- Reconnect back glass cable.
- Reconnect battery cable.
- Secure connector covers with screws.
- Press evenly around edges to seal.
- Reinstall bottom screws near charging port.
Your back glass replacement is complete.
Final Checks After Repair
Before regular use, confirm:
- Wireless charging works correctly
- Flashlight operates normally
- Rear microphone records clear audio
- Back glass sits flush with frame
- No dust inside camera lenses
FAQs — iPhone 16 Pro Max Back Glass Repair
Can I replace the back glass myself?
Yes, with patience and proper tools, this repair is achievable for careful DIY users.
Do I always need calibration?
Not always. Calibration may not be required if original components are reused.
Will water resistance return?
Only if new waterproof adhesive is applied correctly.
What happens if Repair Assistant fails?
The phone will still work, but the part may appear as “Unknown” in system settings.
Final Thoughts
Replacing the iPhone 16 Pro Max back glass is a detailed repair, but it’s an effective way to restore both appearance and functionality without replacing the entire device.
Taking time to heat adhesive properly, transfer components carefully, and perform calibration ensures the best long-term results.