If your iPhone 16 Pro Max charging port is not working, charging intermittently, loose, or completely damaged, you don’t necessarily need a new phone. In many cases, replacing the charging port assembly restores normal charging and connectivity.
This detailed DIY guide explains how to replace the iPhone 16 Pro Max charging port step by step, including safe disassembly, installation, testing, and restoring water resistance after repair.
🔧 Tools Required for iPhone 16 Pro Max Charging Port Repair
Before starting, prepare the following tools:
- Pentalobe screwdriver (0.8 mm)
- Tri-Wing screwdriver (0.8 mm)
- Phillips screwdriver (1 mm)
- Standoff screwdriver (1.5 mm)
- Tweezers
- Plastic pry tools / spudger
- Suction cup
- Screen disassembly tool
- Waterproof adhesive sealing tape
- Hair dryer or heat gun (90°C recommended)
- Magnetic mat (recommended)
Using proper tools helps prevent internal damage during repair.
⚠️ Preparation Before Disassembly
- Power off your iPhone:
- Press and hold Power + Volume Up buttons.
- Remove the two bottom screws beside the charging port.
- Organize screws carefully using a magnetic mat to simplify reassembly.
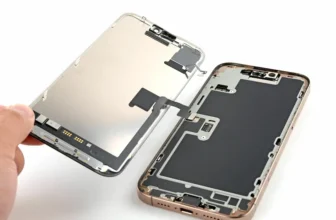
🔥 Step 1: Remove the Back Glass
The charging port sits beneath several internal components, so the phone must be opened first.
Heat the Back Glass
- Warm the back panel for about 1 minute.
- If using a heat gun, set it to 90°C to soften adhesive safely.
Separate the Back Glass
- Place a suction cup near the bottom edge.
- Gently lift to create a gap.
- Insert a thin blade carefully.
- Slide a plastic tool around the edges.
⚠️ Do not insert tools deeper than 3 mm to avoid damaging internal parts.
At the top, slide the panel downward slightly to release the metal hinges, then lift carefully.
🔌 Step 2: Disconnect Battery and Internal Components
Before touching internal hardware:
- Remove connector cover screws.
- Disconnect:
- Battery cable
- Back glass cable
Disconnecting power prevents short circuits during repair.
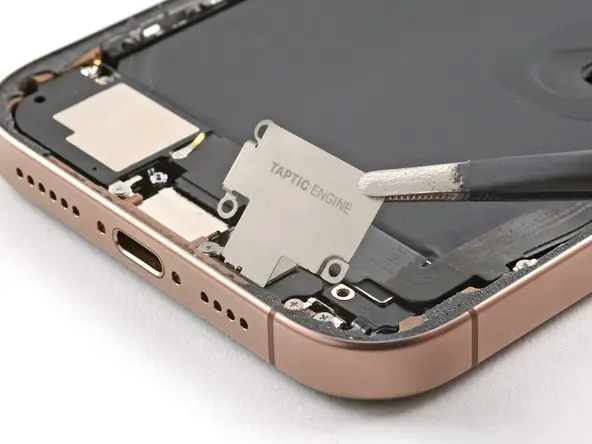
🔊 Step 3: Remove Taptic Engine and Bottom Speaker
Remove Taptic Engine
- Unscrew the Taptic Engine cover.
- Disconnect its cable.
- Carefully lift and remove the Taptic Engine.
Remove Bottom Speaker
- Unscrew mounting screws.
- Remove the speaker assembly.
These components block access to the charging port.
⚡ Step 4: Remove the Charging Port Assembly
- Remove screws securing the charging port.
- The charging port flex cable is attached with adhesive.
- Gently heat the area to soften adhesive.
- Carefully peel the cable away from the iPhone body.
If your phone:
- Doesn’t charge
- Charges only at certain angles
- Shows accessory errors
then replacing this module usually fixes the issue.
🆕 Step 5: Install the New Charging Port
- Position the replacement charging port correctly.
- Align the flex cable carefully.
- Secure it using screws.
- Ensure adhesive sits flat without folds.
Reinstall all removed components in reverse order.
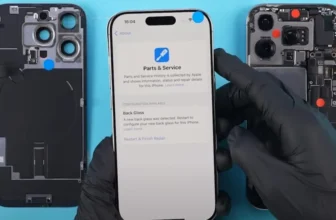
✅ Step 6: Test the Charging Port
Before sealing the phone completely:
- Power on the iPhone.
- Connect a charging cable.
- Confirm:
- Charging starts instantly
- Cable fits securely
- No connection interruptions
Testing now prevents reopening the device later.
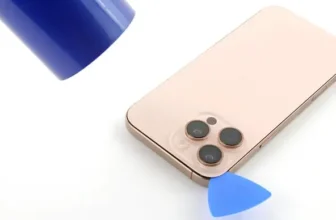
💧 Step 7: Restore Water Resistance
Opening the device breaks Apple’s factory seal, so waterproofing must be restored.
Apply New Waterproof Adhesive
- Remove old adhesive tape.
- Clean residue using 91%+ isopropyl alcohol.
- Align new sealing tape precisely along frame edges.
- Press adhesive firmly using a plastic tool.
Use a rubber blower to remove dust before sealing the device.
🔧 Step 8: Final Assembly
- Reconnect back glass cable and battery.
- Secure all screws and brackets.
- Press evenly around edges to seal the back glass.
- Reinstall the two bottom screws.
Your charging port repair is now complete.
🔗 Related iPhone Repair & Tech Guides
For more smartphone repair tutorials, comparisons, and mobile updates in Pakistan, visit:
You can also explore other iPhone repair guides and latest device information helpful before upgrading or repairing your device.
❓ FAQ — iPhone 16 Pro Max Charging Port Repair
1. Why is my iPhone 16 Pro Max not charging?
Common reasons include a damaged charging port, dust buildup, or a faulty flex cable.
2. Can I replace the charging port myself?
Yes, if you have proper tools and follow a careful step-by-step process.
3. How long does charging port replacement take?
Typically 1–2 hours depending on experience level.
4. Will water resistance remain after repair?
Only if new waterproof adhesive sealing tape is applied correctly.
5. Should I test charging before closing the phone?
Yes. Always test charging functionality before final sealing.