If your iPhone 16 Pro Max screen is cracked, broken, or not responding to touch, you don’t always need to replace the entire phone. With the right tools and careful steps, you can replace the display yourself and restore your device to like-new condition.
This complete guide explains how to replace the iPhone 16 Pro Max screen step by step, including calibration, troubleshooting, and restoring water resistance after repair.
🔧 Tools Required for iPhone 16 Pro Max Screen Replacement
Before starting the repair, prepare the following tools:
- Pentalobe screwdriver (0.8 mm)
- Tri-Wing screwdriver (0.8 mm)
- Tweezers
- Plastic pry tools / spudger
- Suction cup
- Screen disassembly tool
- Waterproof adhesive sealing tape
- Hair dryer or heat gun (set around 80°C)
- Isopropyl alcohol (91% or higher)
👉 Using proper tools helps prevent internal damage during screen removal.
⚠️ Important Safety Steps Before Starting
- Power off your iPhone
- Press and hold the Power + Volume Up buttons.
- Remove the two screws near the charging port.
- Work on a clean, static-free surface.
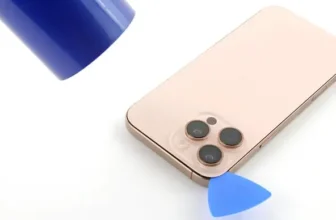
🔥 Step 1: Heat the Screen to Soften Adhesive
Apple uses strong waterproof adhesive to seal the display.
- Heat the bottom edge of the phone for about 1 minute.
- The screen should feel warm, not hot.
- If using a heat gun, keep temperature around 80°C.
A properly heated screen separates much more easily.
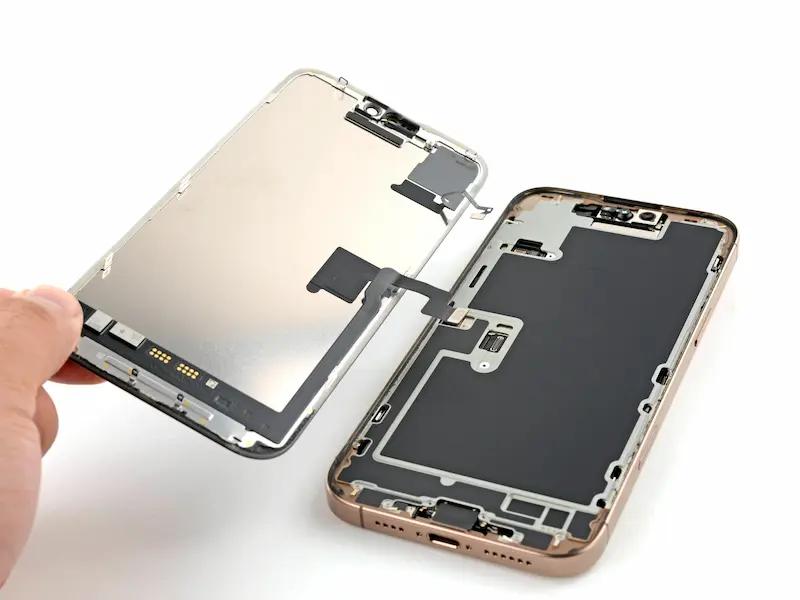
📱 Step 2: Separate the Display from the Frame
- Place a suction cup near the bottom edge.
- Gently pull upward to create a small gap.
- Insert a thin pry tool carefully.
⚠️ Do NOT insert tools deeper than 3 mm to avoid damaging internal components.
Continue heating and slowly moving around the edges until the display loosens.
🔩 Step 3: Open the iPhone Display
The display is secured with metal hinges at the top.
- Slide the display slightly downward to release hinges.
- Lift carefully — cables are still connected to the motherboard.
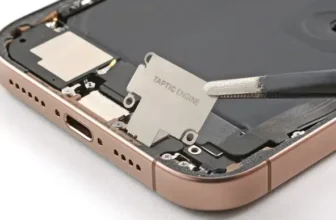
🔌 Step 4: Disconnect the Screen
- Remove screws holding the connector brackets.
- Use a plastic spudger to disconnect:
- Display cable
- Front sensor cable
Now the screen can be fully removed.
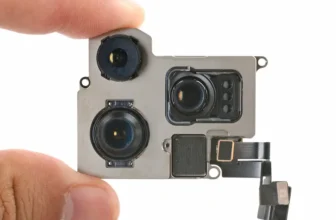
🔄 Step 5: Transfer the Proximity & Light Sensor
The front sensor assembly must be moved to the new screen.
- Remove the bracket screw.
- Apply slight heat to soften adhesive.
- Carefully detach the sensor flex cable.
- Transfer it to the replacement display.
Be extremely gentle — this component is delicate.
🆕 Step 6: Install the New iPhone 16 Pro Max Screen
- Attach the front sensor to the new display.
- Apply slight heat so adhesive sticks securely.
- Reinstall the metal bracket.
- Tighten the screw.
⚙️ Step 7: Connect and Test the New Screen
Before sealing the phone:
- Reconnect display cables.
- Power on the iPhone.
- Test touch response and display quality.
If everything works, proceed to calibration.
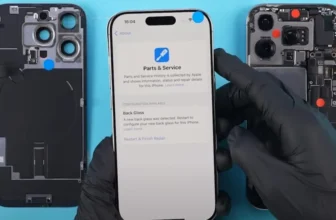
📲 Step 8: Calibrate the Display Using Repair Assistant
After replacement, Apple requires display calibration.
Follow these steps:
- Go to Settings → General → About
- Open Parts & Service History
- Tap Restart & Finish Repair
- Connect to Wi-Fi
- Ensure battery is above 20%
The Repair Assistant will configure the display automatically.
❗ Fix: Repair Assistant Not Working
If calibration fails, try:
- Use a stable Wi-Fi connection
- Charge battery above 20%
- Restart device and retry
- Reconnect display cables
- Ensure screen is properly installed
👉 Some third-party displays may show “Unknown Part” status but still work normally.
🔒 Activation Lock Warning
If the replacement display came from another iPhone:
- It may be linked to the previous owner’s Apple ID.
- You’ll need their account credentials to complete calibration.
Without authentication, the display may function but remain unverified.
✅ Step 9: Test Important Features
After calibration, check:
- True Tone
- Auto Brightness
- Touch responsiveness
- Dead spots on screen
💧 Step 10: Restore Water Resistance (Very Important)
Opening the iPhone breaks the original waterproof seal.
To restore protection:
- Remove old adhesive tape.
- Clean residue using isopropyl alcohol.
- Apply new waterproof sealing tape carefully.
- Align tape perfectly with frame edges.
- Press firmly using a plastic tool.
🔧 Step 11: Final Assembly
- Reconnect all display connectors.
- Secure brackets with screws.
- Press around screen edges evenly.
- Reinstall bottom screws near charging port.
Your repair is now complete.
✅ Final Result
After completing these steps, your iPhone 16 Pro Max screen should function like new, with restored touch performance and proper calibration.
🔗 Helpful Guides You May Also Like
If you’re repairing Apple devices, you may also find these guides useful:
(Explore more repair tutorials, price updates, and tech guides.)
❓ FAQ — iPhone 16 Pro Max Screen Replacement
1. Can I replace an iPhone 16 Pro Max screen at home?
Yes, if you have proper tools and follow careful step-by-step instructions.
2. Will True Tone work after screen replacement?
Yes, after completing calibration through Repair Assistant.
3. Why does my iPhone show “Unknown Part”?
This usually happens when using third-party replacement displays.
4. Is water resistance restored after repair?
Only if new waterproof adhesive sealing tape is installed correctly.
5. How long does screen replacement take?
Typically 45–90 minutes depending on experience level.